How to Use Asana as a CRM
Written by: Victoria Yu
Victoria Yu is a Business Writer with expertise in Business Organization, Marketing, and Sales, holding a Bachelor’s Degree in Business Administration from the University of California, Irvine’s Paul Merage School of Business.
Edited by: Sallie Middlebrook
Sallie, holding a Ph.D. from Walden University, is an experienced writing coach and editor with a background in marketing. She has served roles in corporate communications and taught at institutions like the University of Florida.
Updated on November 27, 2024

Asana Inc.’s flexible workflow management software allows a company to visualize, track, and manage team projects. Its pricing starts with a free basic package, so it’s a popular work management tool for budding small businesses.
But more than workflow, for particularly tech-savvy entrepreneurs, Asana can be customized and modified to be used as a customer relationship management (CRM) system.
For companies whose customers are the heart of their business, mixing workflow and customer management into the same platform might be the wisest move. If that sounds like you, follow our lead to learn how to use Asana as a CRM.
Key Takeaways
Asana is a collaborative project management software that can be used as a customer relationship management (CRM) tool.
Asana provides free templates to help build and manage a sales pipeline using its system.
Businesses can customize Asana’s layout to fit their own sales pipeline and set workflow automation rules to help make the sales process more efficient.
When Should I Use Asana as a CRM?
Don’t get us wrong – if your company uses customer interactions and management to drive value and growth, you’d probably be better off using a designated CRM from the start.
Broadly speaking, a CRM tracks the customer journey from beginning to end, recording every customer interaction with the company and acting as an archive for previous customer data. Advanced CRM systems can even help a company with automatic lead generation and qualification, advanced analytics, and marketing and sales automation.
Asana might not have those advanced features, but by designating each customer as a project, it provides a centralized platform for sales managers to assign leads, visualize its sales pipeline and workflows, and estimate each customer’s time to close.
Using Asana, a company can track and customize the customer lifecycle and ensure no customers get lost between cracks, delivering a better customer experience and improving your bottom line.
In other words, while a designated CRM might be better for those needing detailed contact management and interaction tracking, Asana works just as well as a lightweight workflow and customer management system.
Additionally, Asana is accessed online through your internet browser or a mobile app, so you can work on the go from any device with ease.
How to Use Asana as a CRM
Now, let’s take a step-by-step look at how you can create a sales pipeline in Asana and track customers.
1. Create Your Asana Account
To start off, head to Asana’s website and click “Get Started” to select a package and create an account.
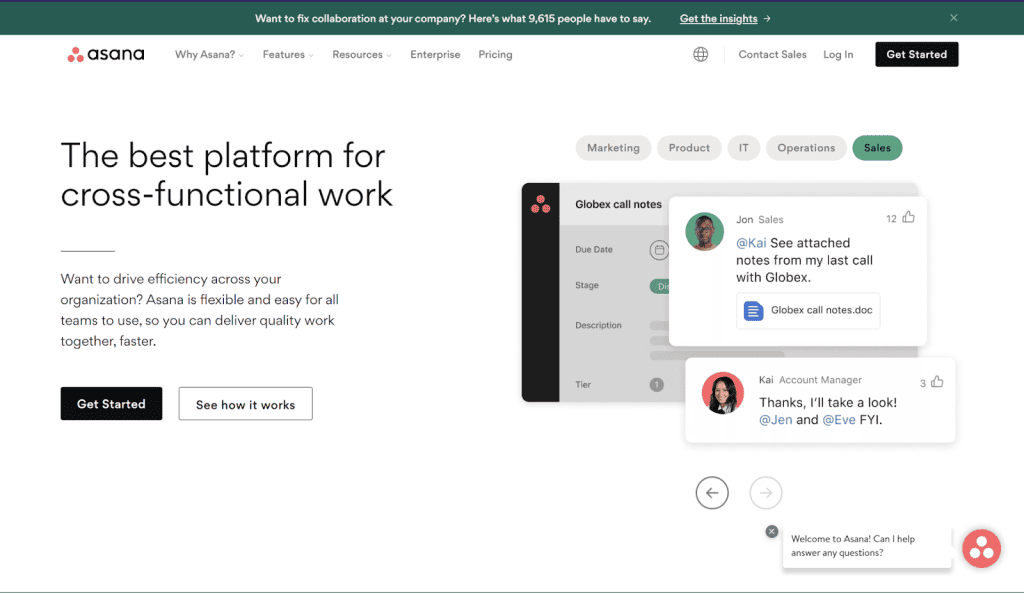
Go through the registration process until you gain access to the application.
From the home screen, click “Create” and select “Project” from the dropdown menu. This project will be your central hub for customer management.

For now, let’s use a template to create our first project. As you gain more proficiency, you can choose to start from scratch and build a fully-customized workflow.

Scroll down through the list of templates until you find the Sales section. Click “Sales Pipeline” to view details on the template, and hit “Use Template” in the top right to select it.
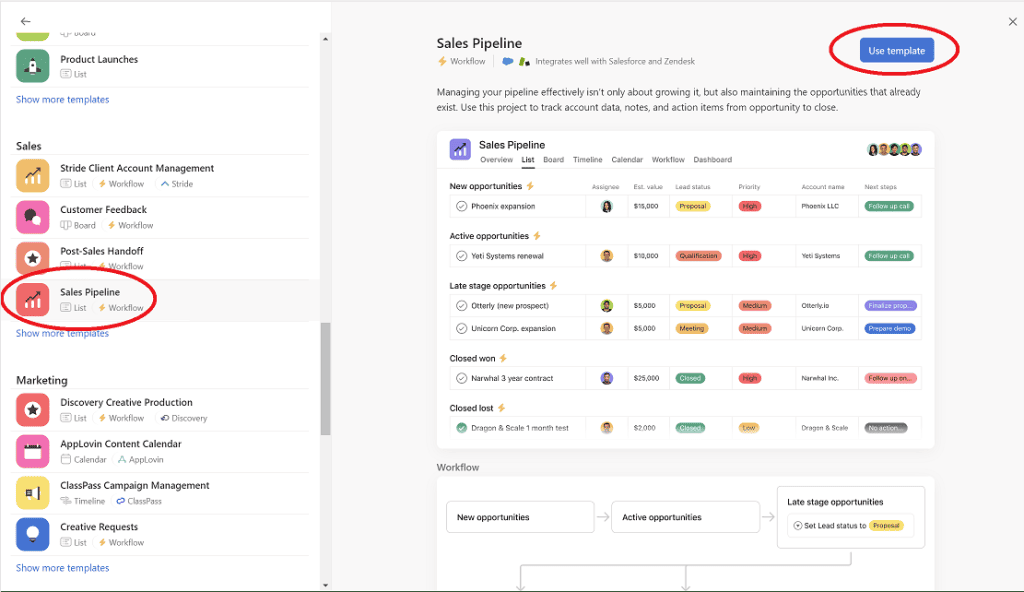
Enter your pipeline’s name, choose your collaborators and privacy settings, and click “Create project.”

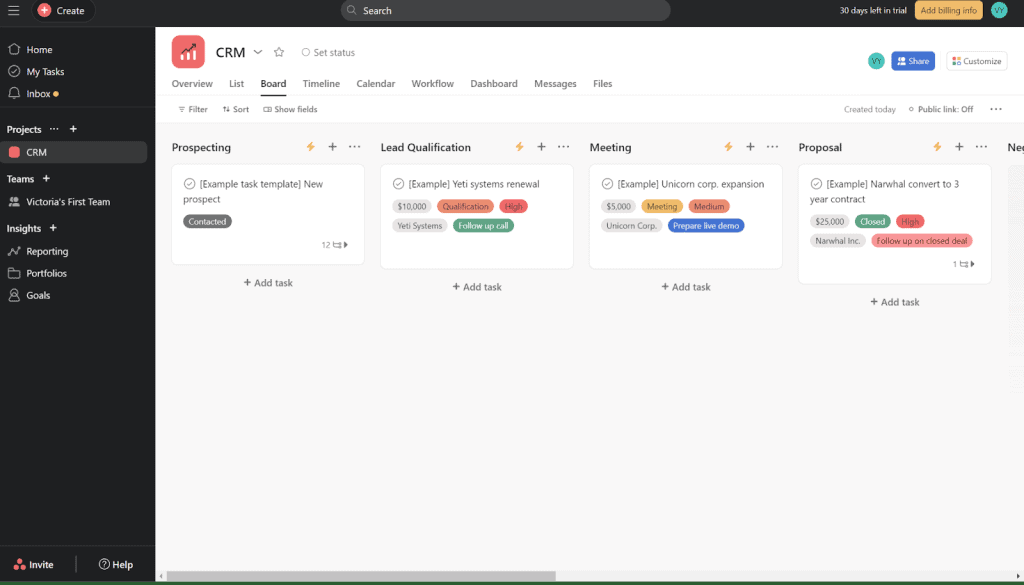
Your home dashboard (with Asana’s example tasks) should look like this.
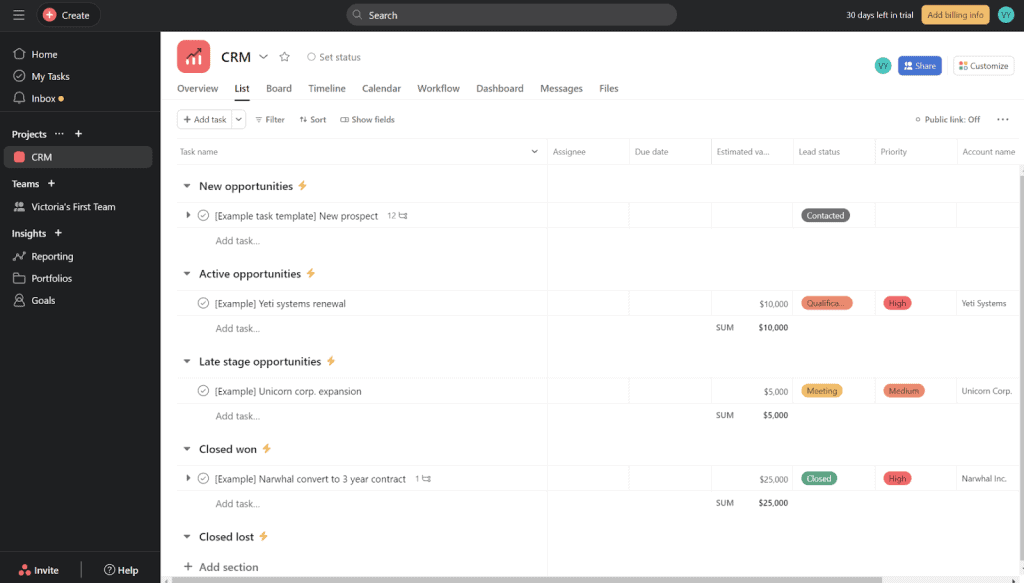
2. Customizing Asana to Your Sales Pipeline
Now that you’ve created your first project, it’s time to customize it to your company’s sales pipeline.
First off, you can switch between the list, board, timeline, and calendar layouts near the top. Let’s switch from the list layout to the more visually intuitive Kanban board layout.
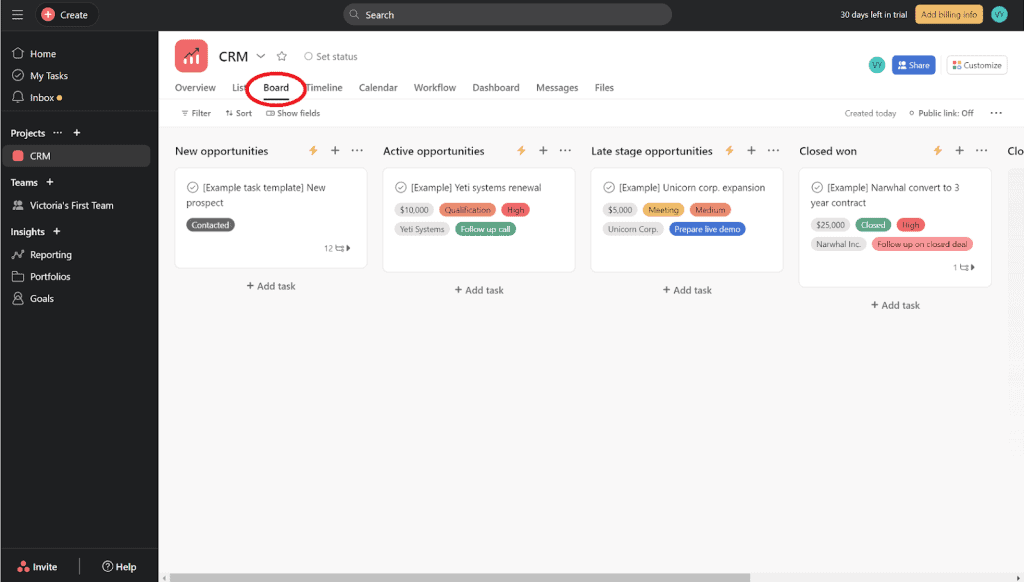
Next up is to customize your sales pipeline, which is an overview of your company’s internal processes to get a customer to purchase.
Asana’s template automatically sets its sales pipeline stages as “New opportunities,” “Active opportunities,” and “Late stage opportunities,” but your company likely has more complex pipeline stages and different nomenclature.
To customize your pipeline in Asana, click the “…” next to each section column to change its name and add or delete sections. There’s also a permanent “Add section” button at the far right end of your board.

For this demonstration, our sales pipeline will have seven steps: prospecting, lead qualification, meeting scheduling, proposal, negotiation, closing, and follow-up. We also added a column to archive all former customers.
The result looks like this, still populated with Asana’s default example cards.
3. Managing Lead Information
Now let’s say you’ve got a new lead or customer. How would you input them into Asana and manage their sales process?
First, click “Add task” under “Prospecting” to create a new card for your lead. Double-click on the resulting card to expand its details.
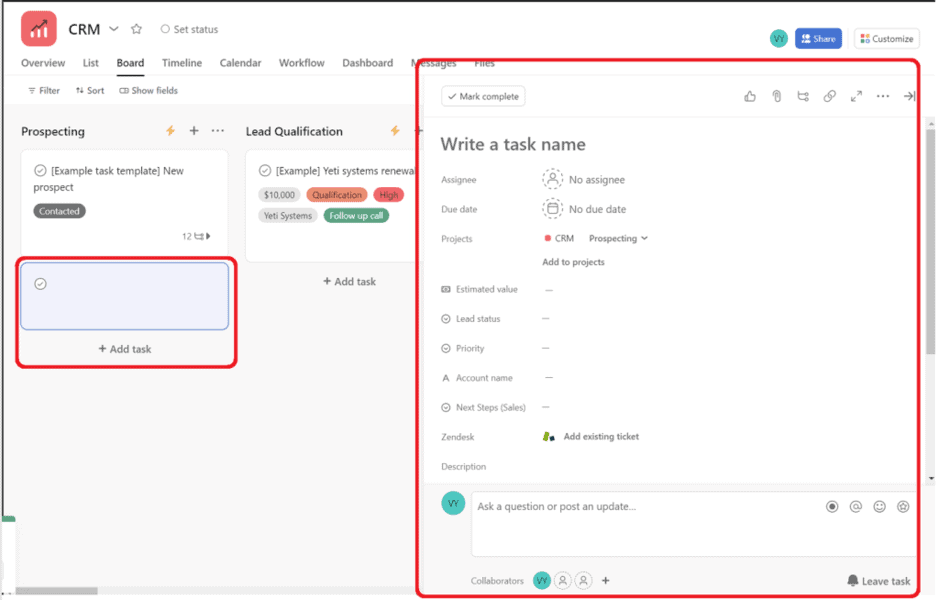
With this card, you can designate a team member for the task, a due date, the estimated value for the deal, the lead’s status and priority, the lead’s account name, and the next steps for your team.
Let’s say we’re hoping to sell a batch of vacuum cleaners to our potential buyer SoccerStar LLC. Here’s what their card might look like.
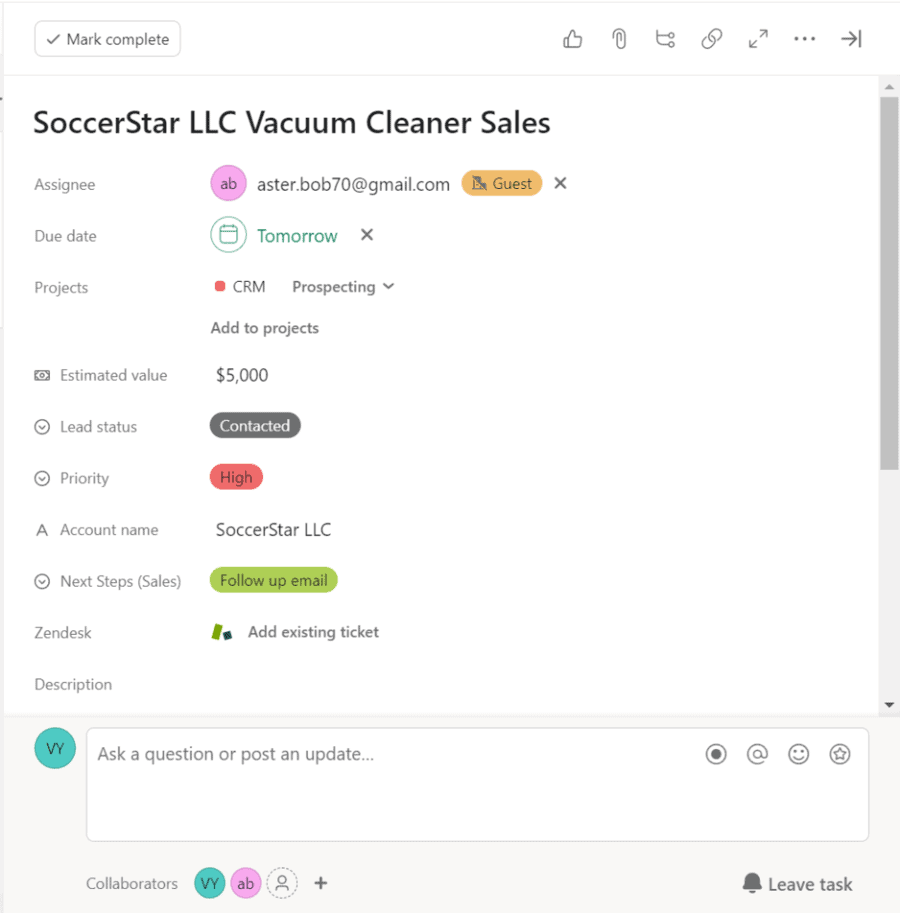
Note that because we used Asana’s template, we can’t edit the options for the “Lead status,” “Priority,” and “Next Steps (Sales)” fields. You can, however, add new fields by clicking “Customize” in the top right of your dashboard.
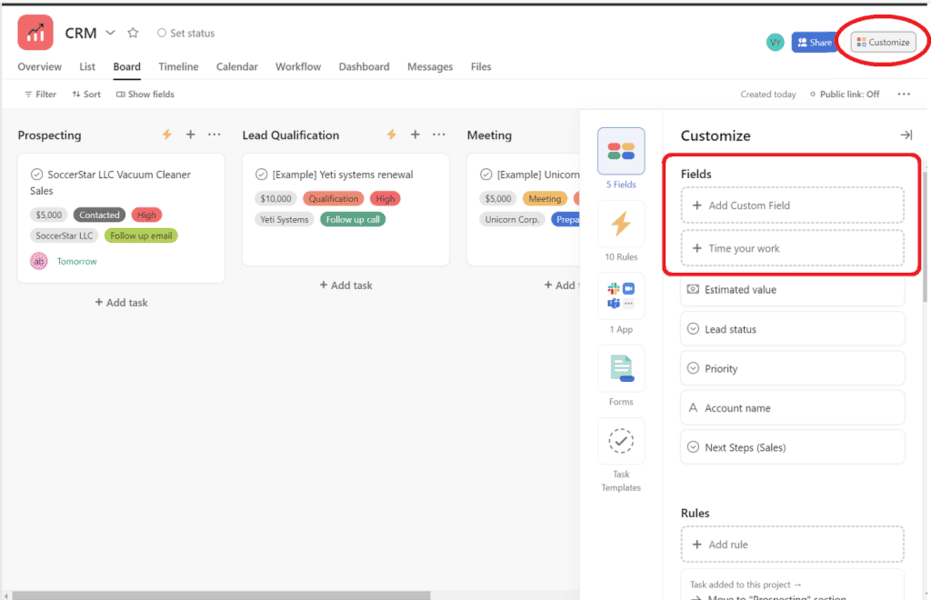
Click “Add Custom Field” to create a new category to sort and qualify your leads by, and choose what format the information will be displayed in. For example, we’ll add a new field for the lead’s email address and select “Text” as its format.

Once you’ve created all the qualifying fields for a single card, you can go back to its expanded details and click “Convert task to template” to make a template out of the card.

Now, when you add new leads with the “Add task” button, you can immediately generate a task card with all the necessary fields!

4. Managing Accounts
Now that you’ve created your workflow and a template for new leads, all that’s left is to nurture each lead through the sales pipeline and make the sale.
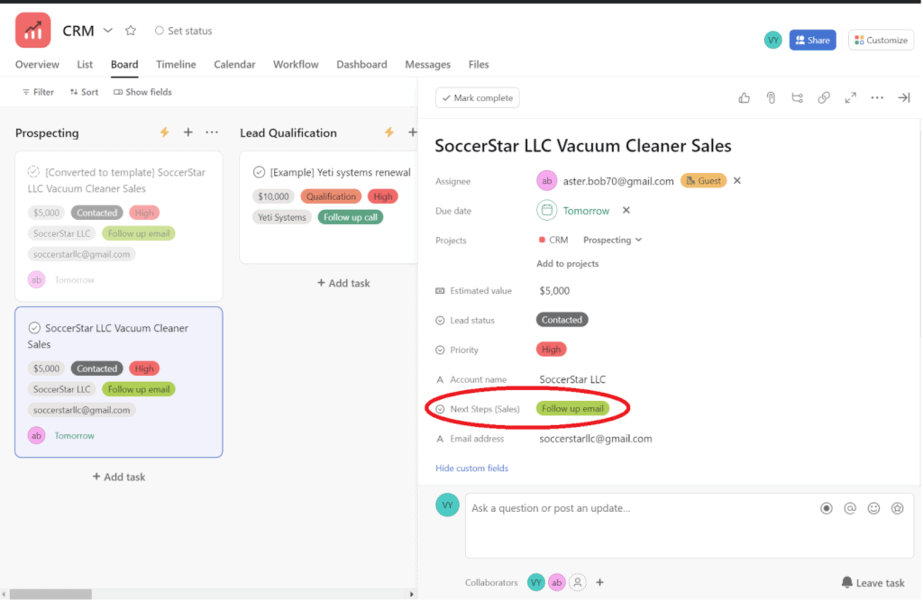
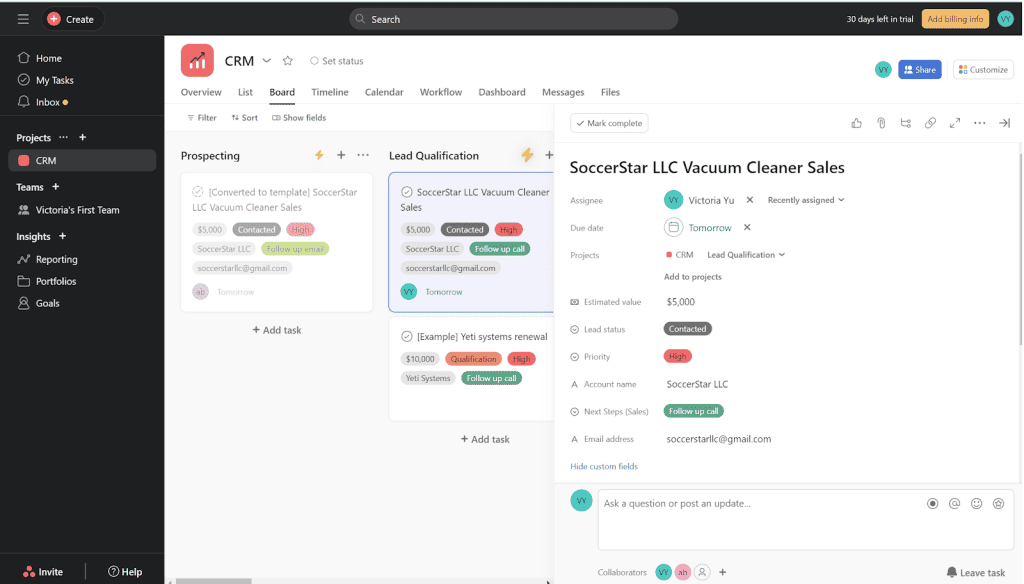
Going back to our example with SoccerStar LLC, let’s say that the sales rep assigned to the lead, Bob, has finished prospecting and has all the information he needs to begin the lead qualification process.
Move tasks and leads from one section to the next by clicking and dragging.
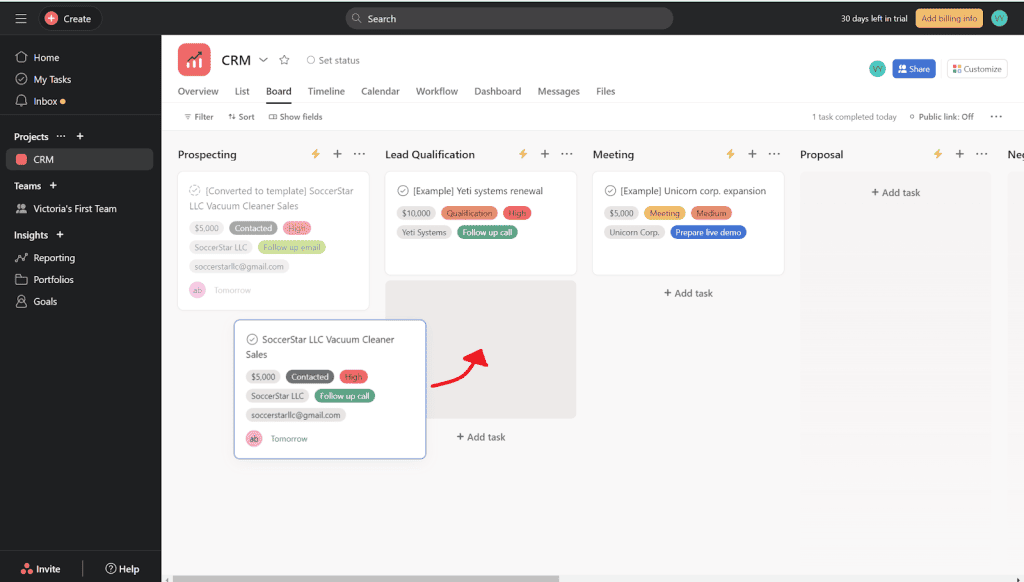
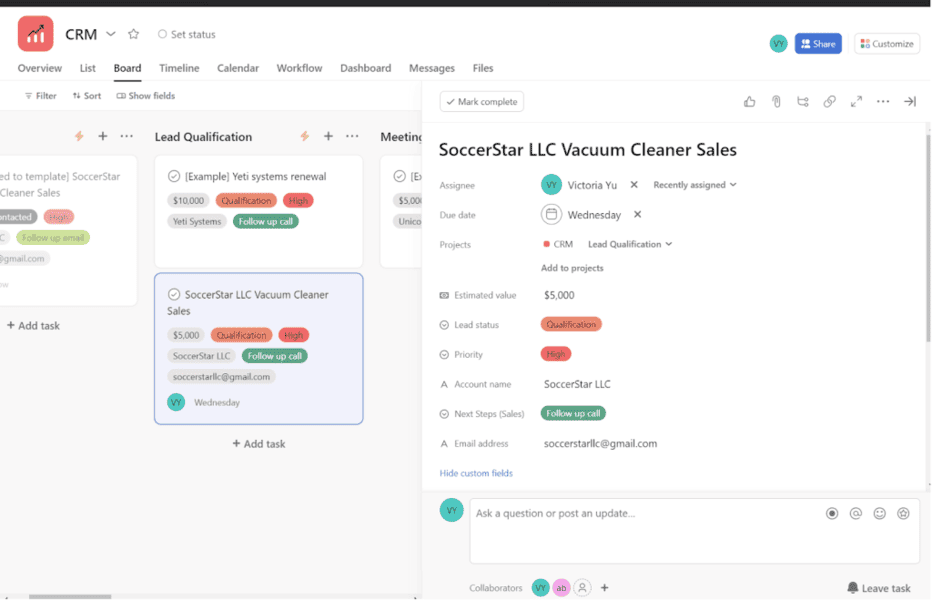
Then, in the task’s details, Bob can assign the lead to someone else, set a new due date, and set the next steps for the sales process.
Everyone with access to this project dashboard can see from a glance how progress is being made with the lead.
As a bonus, Asana includes workflow automation features: rather than manually moving a lead from one section to another, you can designate rules so that when certain actions are completed, Asana will automatically execute certain other tasks. This saves your employees quite a lot of time and drudgery.
To manage these rules, hit the lightning bolt symbol at the top of each section, and click “Add rule.”
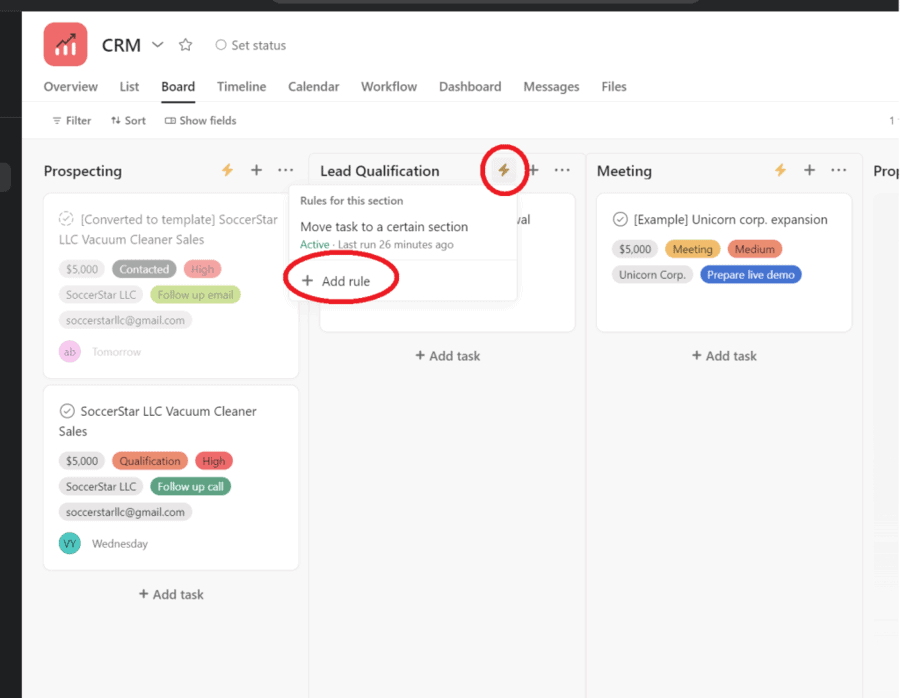
Here, you can set actions that, when executed in any other column, will trigger other sets of actions.
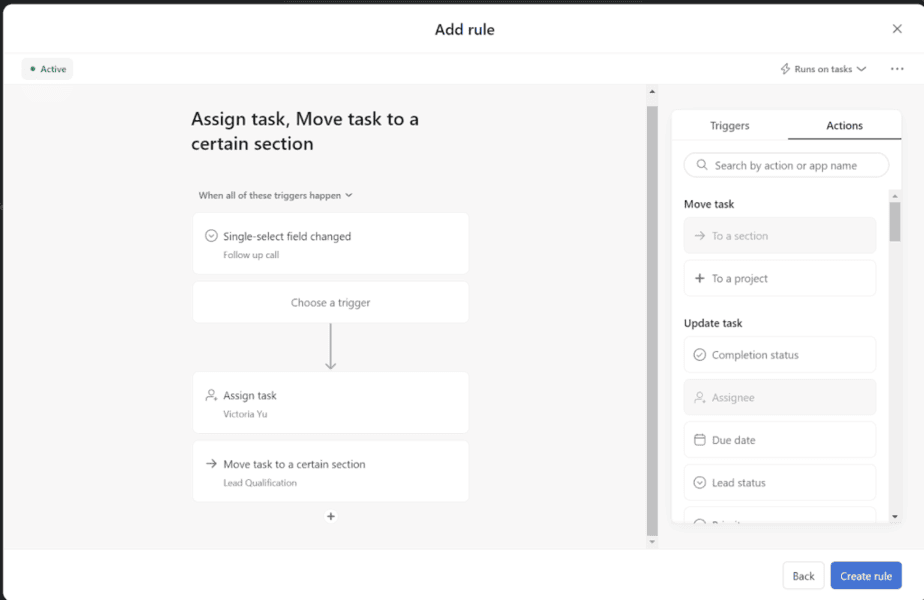
Here, we set the trigger to when a card’s “Next Steps (Sales)” field is changed from “follow up email” to “follow up call.” The resulting actions are that it will move the card to the “lead qualification” section and assign the task to someone else.
With this rule, Bob doesn’t have to manually move the task card and change the details anymore.
Pretty convenient, isn’t it?
With this, you’ve created an automated sales workflow in Asana that manages sales tasks and gives your team a 360-degree view of the sales pipeline. Congratulations!
FAQs
Why should I use Asana as a CRM?
Asana’s collaborative project management software offers a free entry-level package, an easy and intuitive task management system, and workflow automation. As a cloud-based system, users can access it from their browser or by desktop or mobile app for task and customer management on the go.
If you only want a CRM system to help assign tasks to your sales team and manage your workflow, Asana is a suitable solution that could help you track your customers through the sales pipeline.
For some businesses, not using a designated CRM software might be better. Beyond simply managing leads and customers, businesses can use Asana as a versatile system to manage other internal projects as well, solving two problems for the price of one software solution.
Why shouldn’t I use Asana as a CRM?
As we mentioned, Asana isn’t a designated CRM software and lacks some features a true CRM system would provide.
Some examples of features Asana can’t provide are lead generation, segmenting, and qualification tools, reporting and analytics tools, customer touchpoint management, and task handover to other business functions.
How much does Asana cost?
Asana has four packages: the free entry-level package, the Premium package that costs $10.99/user/month, the Business package that costs $24.99/user/month, and the Enterprise package for which the price is only available by quote.
Most CRM software pricing ranges from $10 to $50 per user per month, so Asana’s pricing is fairly par for the course.
What are some alternatives to using Asana as a CRM system?
Some CRM alternatives to Asana are HubSpot CRM and Salesforce CRM. HubSpot also offers a free entry-level package, so if the low price was what attracted you to Asana, we’d recommend you install HubSpot instead.
